Nogaro DP’s Installed

The Nogaro showed up with a catless exhaust setup, not something I was thrilled with, so I began looking into options to get a different setup on the car.

Borla one piece
Borla one piece

Another local S4 owner has a ‘project’ car they recently acquired from an owner who had made questionable decisions to it as well. The exhaust on that car had catalytic converters, so we made a swap.

Replacement Exhaust
Replacement Exhaust

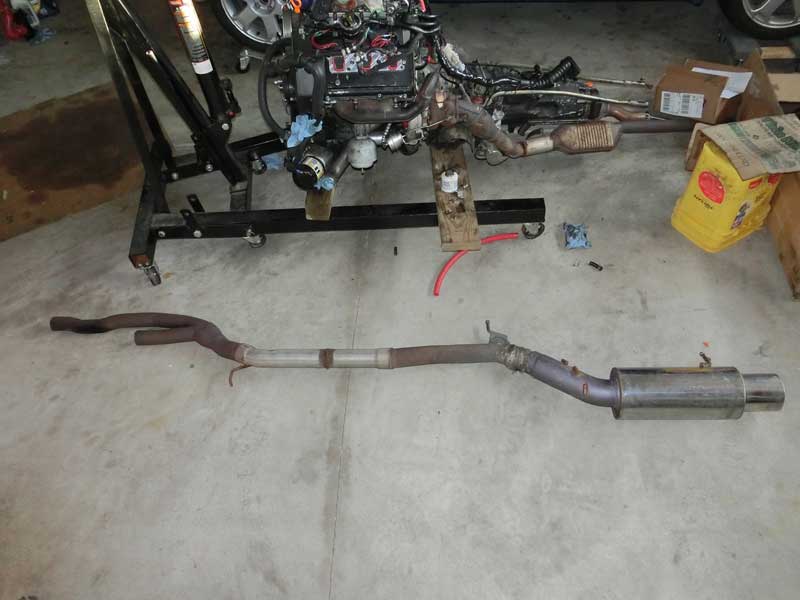
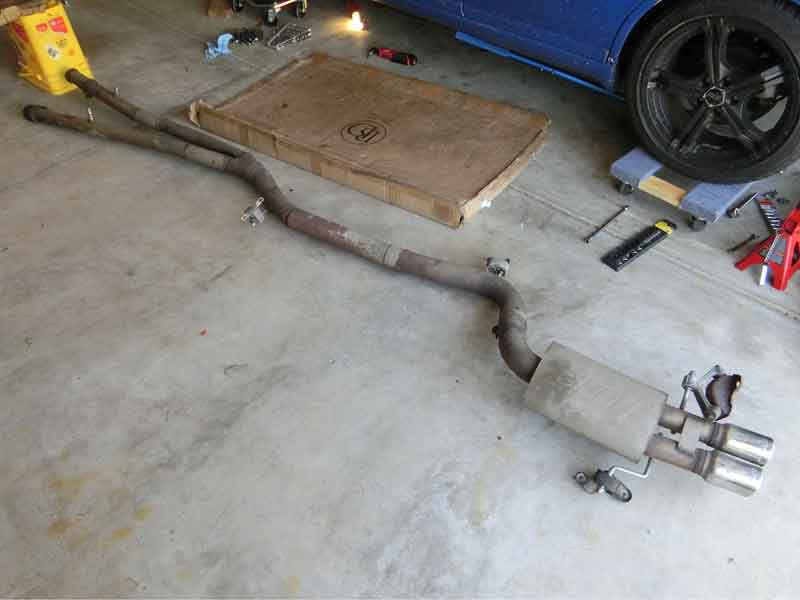
What arrived was a one piece exhaust, yep solid pipe all the way from the turbo flange to the monster tip.  Not a conducive setup for engine installs on jackstands.  I took a sawzall to the pipe and removed the OEM couplers that had been welded in place connecting the stock downpipes (with exhaust dumps!) to the frankenpipe.

Removed OEM exhaust clamps
  1. I’ve installed the stock downpipes onto the turbos.
  2. I scratch my head each time I look at the exhaust dumps welded into the stock downpipes.
  3. I had to MacGyver some nuts and bolts to get the downpipes to attach to the mounting brace on the transmission.
  4. I put proper turbo studs and nuts on in place of the collection of nuts and bolts that were used before to attach the downpipes to the turbochargers.
Nogaro exhaust improvements

I had to marvel at the size of the muffler on this mash up of pieces.

Monster Tip
Monster Tip

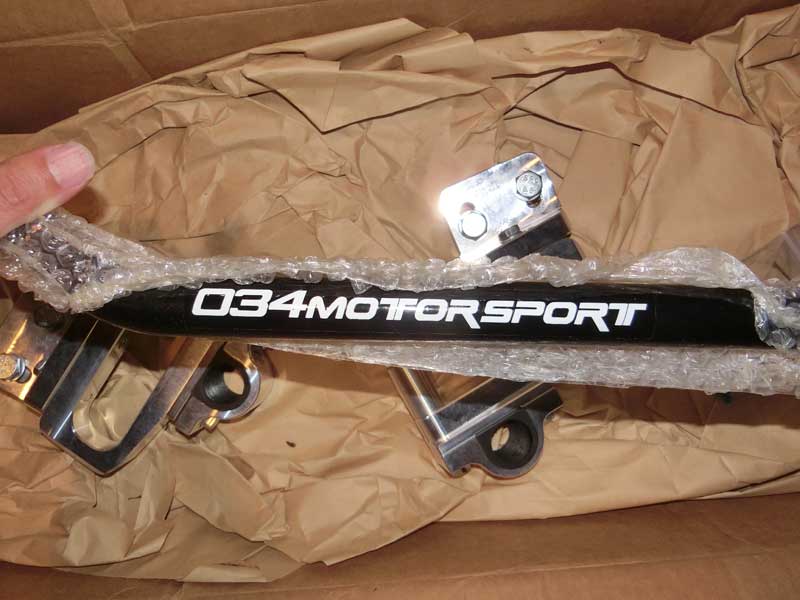
I’ll admit to being the driver of a unfitting exhaust tip for a Audi B5 S4.  The 034 single pipe has a fairly large exhaust tip, I’ve not brought myself to pony up the money to get the dual tip setup, yet.  But what I’ve got on my Silver S4 is nothing like this behemoth.

Monster Tip Diameter

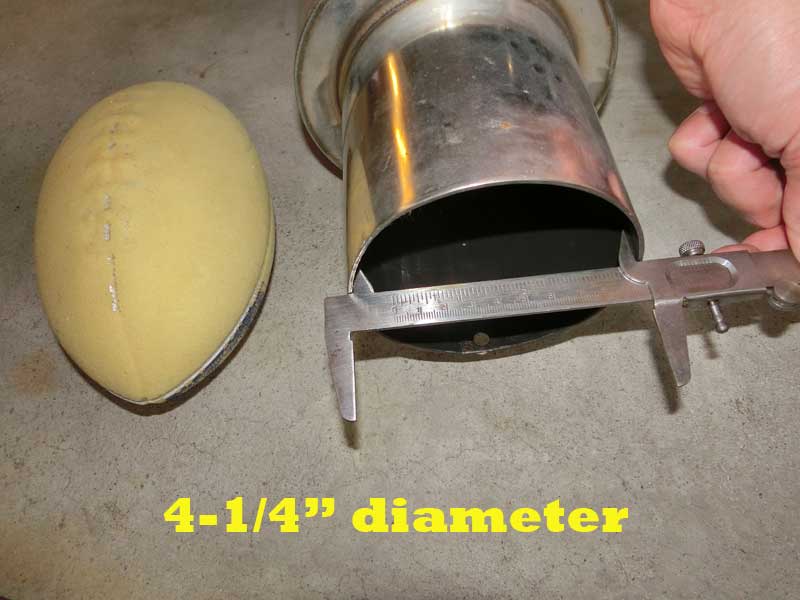
Maybe it’s just the round muffler that exaggerates the absurdity of this exhaust tip.

Monster Tip Ready to Fire

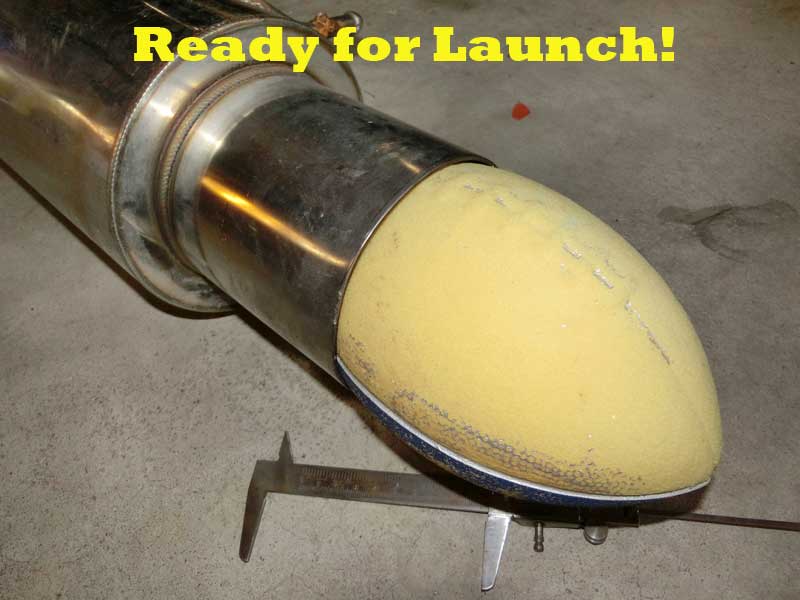
Then again, maybe the tip is absurdly large.

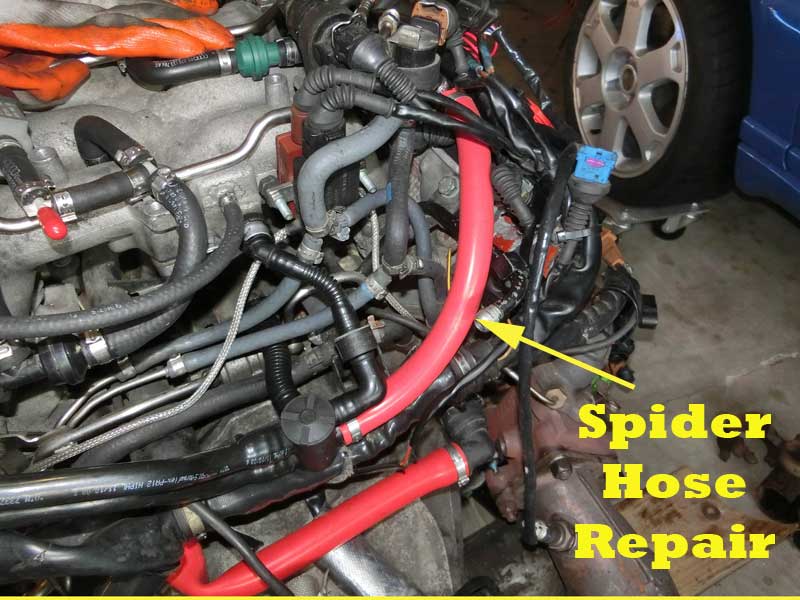
While moving some wiring around I managed to break one of the arms of the spider hose.  On my Silver S4 I’d converted over to a silicone hose setup and had some leftover hose on hand, so I did a repair and added in a silicone arm to the spider hose.

Audi B5 S4 Silicone Spider Hose Arm
Silicone Spider Hose Arm

Another thing I did was ‘undo’ the N249 delete, reinstalling the parts to operate that system.

N249 Retrofit
N249 Retrofit

The prior owner had also tapped the boost gauge into the FPR line, not my first choice given the importance of maintaining correct fuel pressure and my desire not to jeopardize that pressure.  So I added a port on the N249 hoses for the Boost gauge.

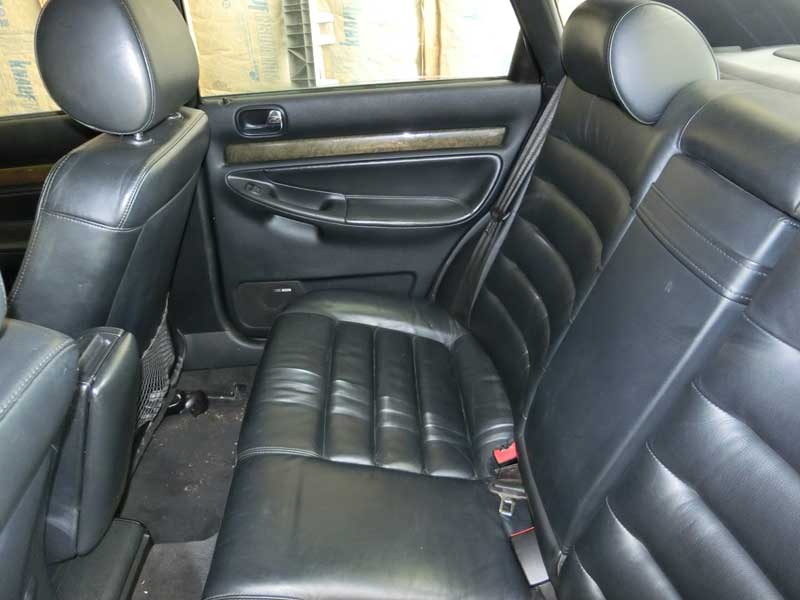
Thus far I’ve spent all of my time focused on attending to components accesible from the vehicle exterior, so I snapped a few photos of the interior which is in pretty decent shape.  Not all that surprising since the car only has 92k on the odometer, low for a B5 S4.

Modified Instrument Cluster

nogaro_frontseat

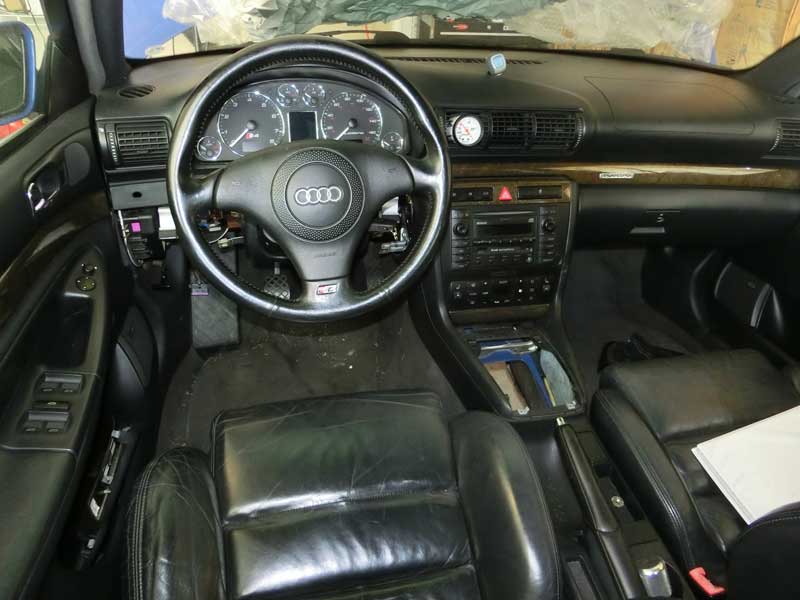
The car had a Podi steering column gauge pod in the trunk, that will become the home to the boost gauge that was poorly placed in the center vent.

nogaro_frontseat2

Nogaro Backseat
Nogaro Backseat
Nogaro Backseat
Nogaro Backseat

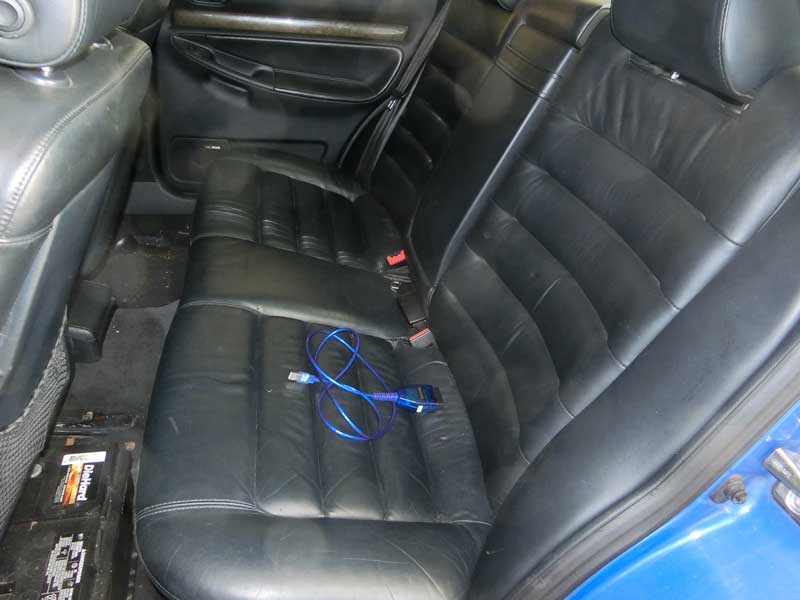
The car was delivered with a new battery, so new the old one is still on the floor of the back.

Nogaro WG Setting

Before I begin the reinstallation of the Nogaro’s engine I want to ensure the turbocharger wastegates are set to an appropriate preload level.  The first thing I noticed was that with an acceptable preload the end of the wastegate arm was going to extend a bit further than I cared for.

wastegate_arm_extension

I took a Dremel cutoff wheel to the wastegate arms to trim both down a little.

wastageta_arm_trimmingI found that the Nogaro had shown up with the preload set to approximately 2 psi, on a K04 turbo that’s low.  I upped the preload to approximately 6 psi which is closer to what the BW K04’s come set at.

Later I undertook one of my least favorite routine maintenance activities, replacing the fuel filter.  By the looks of things this Nogaro made it to 90k miles for its first fuel filter change.

Swaybar Day

Today I decided to tackle installing the front swaybar on the Nogaro project S4.

The car came with NO swaybars, except a Black Forest Industries Stabila upgraded front swaybar in the trunk.  Lacking a rear swaybar I’ve not been inclined to put a higher than stock rate bar on the front of the car.

I did put the Stabila on the scale to check the weight – 16.6 lbs.  I also measured the diameter of the bar – 29 mm.

BFI Stabila FSB
BFI Stabila FSB

I have not yet measured the OEM S4 front sway bar, but I have read from others that the diameter is the same and weight is also the same as what I recorded for the BFI Stabila.  I need to inquire with BFI about how much greater the rate of this bar is.

OEM Front Sway Bar Installed

I took a used front sway bar that I had and installed it onto the Nogaro car.

034Motorsport Solid Rear Sway Bar

I’ve decided the 034Motorsport Solid Rear Bar that I’ve had in storage for a while will go to a new home, I’m selling it, not installing it on the Nogaro.  The Nogaro will receive a stock B5 S4 rear sway bar.

I may try an upgraded rear bar, but with the STāSIS Öhlins Motorsport Suspension on my Silver S4 I’m guessing the 034 RSB will be overkill if I were to use it on that car.

Audi B5 S4 Information and Testing